Follow our 3-week, get-ready plan to learn how to practise, play and peak for your biggest event of the year.
Opening photograph by Andrew Hetherington
Week 1: Range only, swing basics, hooks + slices, what to eat
IRON PLAY: Check your contact
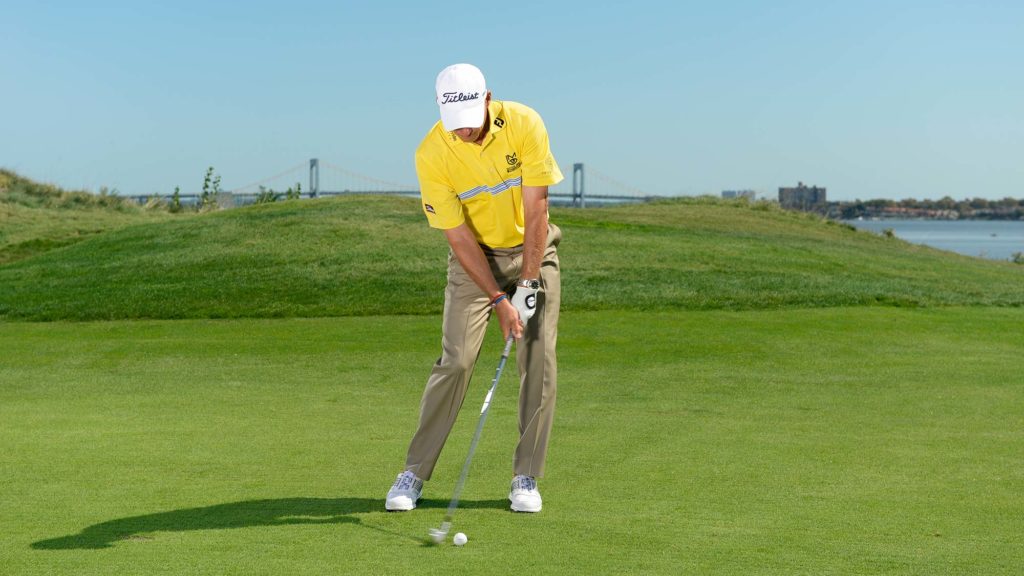
For starters, we have to make sure you’re hitting the ball solidly, which means controlling the low point of the swing. What’s the low point? It’s where the clubhead hits the ground, and with every club except the driver, that point should come just past the ball.
The key is the trail arm (the right arm for righties). On the downswing, the trail arm is straightening [above], but you don’t want it to fully extend until after the strike. If it straightens before impact, the low point moves back, and you hit the ball fat or thin. That’s why so many amateurs struggle to make consistent contact.
This week, practise hitting iron shots focusing on your trail arm staying bent and then straightening past the ball. You’re going to love hitting it flush.

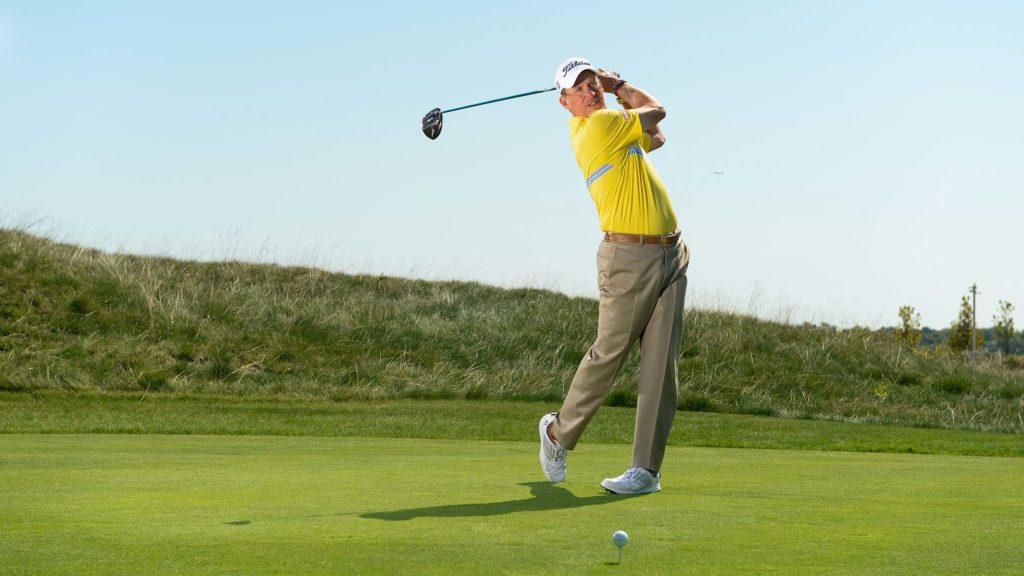
DRIVING: Make a bigger turn
When you’re hitting driver, you need to make a big motion. Most people think about turning the lead shoulder to make a full backswing, but I want you to try something different: focus on rotating your trail shoulder behind your head [above]. Turning the trail shoulder pulls the whole upper body into action.
Grab two alignment sticks, place one on your target line and hold the other across your shoulders, with each hand on the opposite shoulder. Practise turning back by pushing your trail shoulder behind you with your lead hand. I bet you can turn 90 degrees in relation to the stick on the ground. Do that, and you’ve got all the power you need. Hit drivers on the range with one thought: trail shoulder back.
BALL FLIGHT: Experiment with curves
One of the basic skills in golf is curving the ball – on command. If you practise hitting big curves, you’ll start to understand how to tone them down. Most importantly, you’ll figure out which shape is more natural and controllable for you. So head back to the practise tee to hit some more drivers.
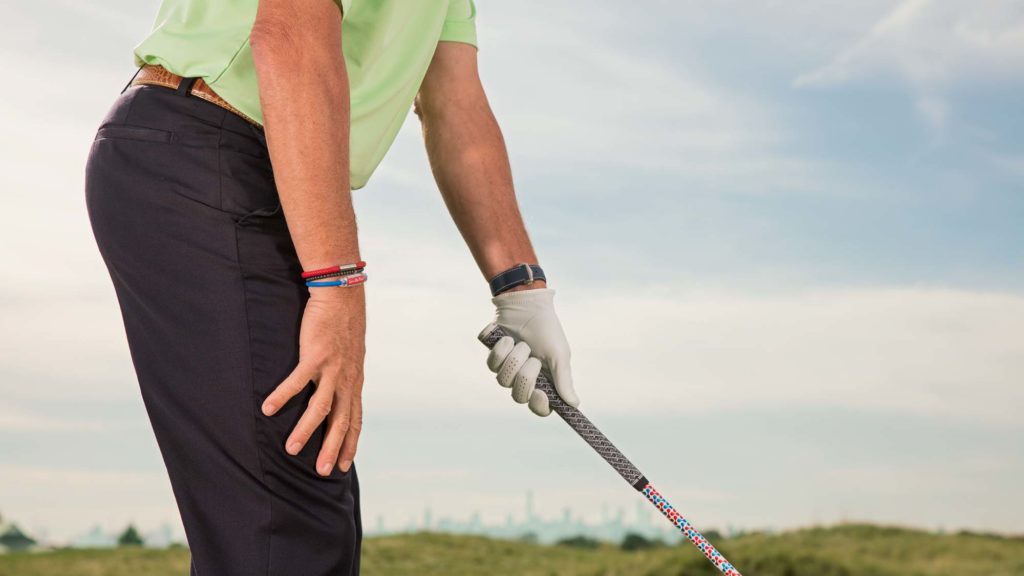
Curve starts with the clubface. To hit draws, take your grip with your trail hand coming onto the club from a low angle by your trail leg [above left]. This will seat the grip more in the palm, which promotes a closed clubface – and a draw. Practise hitting tee shots with this type of grip, and notice that the more you set your trail hand on the underside of the grip, the more draw you put on
the ball.
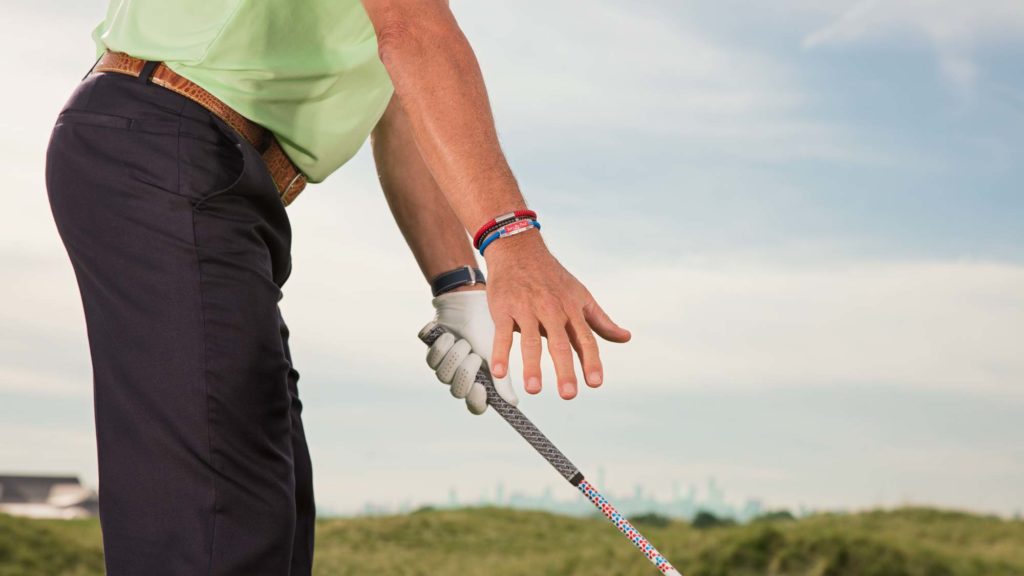
To hit fades, bring your trail hand onto the grip from a high position, with your arm extended in front of you [above right]. This will put the grip more in the fingers, which promotes an open face – and a fade. Hit some tee shots and, again, experiment with the trail-hand position. You’ll see that putting it more on top of the grip creates more fade.
Early on, I want you to create some big curves. Don’t worry that you’re hitting wild tee shots. The point is to understand how to make the ball turn. Next week we’ll work on control.
Dr Ara Says
NUTRITION: Keep your energy up
It’s so important to find out what you can eat to stay energised without spiking your blood sugar. Check the nutrition label on snacks you like. Do the maths. Add up the protein, fibre and fat content. If that sum is more than the total carbohydrates, it’s a good snack.
HYDRATION: Calculate your intake
Studies show if you’re 2 percent dehydrated, your athletic performance drops 10 percent! First, weigh yourself, and then create a plan to drink half of your weight (in ounces; and a millilitre is 30 ounces) of water every day. Make it a habit: set an alarm, even mark four “drink water holes” on your scorecard.
Week 2: Range and course, ball control, wedge play, how to breathe
ACCURACY: Dial in the curve
We talked about creating curve by adjusting the trail hand. Now we’ve got to mould that into predictable shots. The key here is understanding that the direction you swing the club through impact – left or right – has a huge effect on how open or closed the face is when it hits the ball.
Let’s start with the draw. We know that setting the trail hand more under the grip produces a draw, but now combine that with swing path. Set an alignment stick on your target line but angle it out to the “push” side (right side for right-handers). Align your body to the stick and swing through in that direction. The ball should start right and curve left. Notice the more you swing to the right, the more the ball draws.
Now switch to the fade. Place the alignment stick on the “pull” side and line up your body to the stick. Remember, you’re setting your trail hand more on top of the grip – the fade grip. Hit some drives, and you’ll see the ball starts left and curves right. And the more left you swing, the more the ball fades.
One of these ball flights is going to feel better to you. Try to really connect with one shape and start building your confidence in using it.

WEDGES: Develop your own two-swing system
The challenge with wedge play is, you can’t just plug in a club and make a full swing like you do from longer distances. You need to be able to cover a multitude of distances, and do it systematically so you’re not improvising all the time. Sound familiar?
Let’s assume you have three wedges. With two swings for each one, you’d have six shots inside 100 yards – that’s a good start. If your range is well marked, great, otherwise shoot distances with a
rangefinder or drop a headcover every 10 paces to create a distance grid.
Here’s how to develop two swings. Stick a tee in the ground even with the ball you’re hitting and another one two feet closer to the target. Take your longest wedge and hit some shots turning your lead shoulder back until it points at the first tee. Record how far the shots go. Then hit shots turning your shoulder to the forward tee. Record the distances. Do this with two more wedges, and it’s like having six of them in your bag.

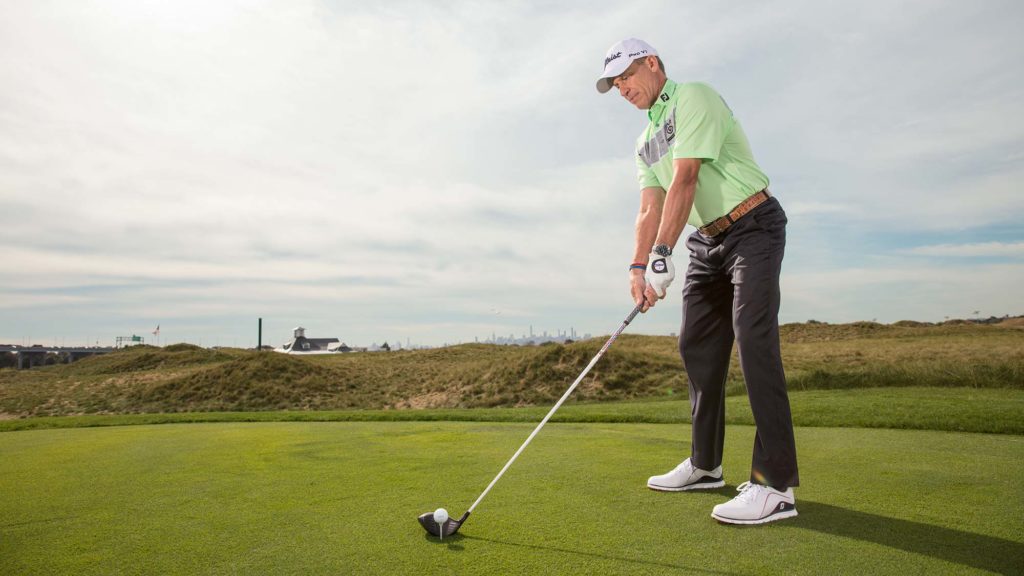
ON COURSE: Test your progress
In Week 1, we didn’t venture off the range, but now I’d like you to start playing a few holes after your practice sessions [above]. The point of these excursions is to field-test the things you’ve been working on: contact, curve, wedge distances. Then, focus your practice on what you see.
On the last day of this week, play a full 18 holes. Keep score and putt everything out; no extra shots or free drops. Make it mean something, and don’t let yourself off the hook easily. Use Dr Ara’s breathing technique when you face a challenging situation. The point is, get a good read on what you trust and what you don’t when you’re feeling some butterflies. You’ve got one more week to shore things up.
Dr Ara Says
BREATHING: Wait for the exhale
I’m a huge fan of intentional breathing for relaxation. But keep in mind, it’s the exhale that matters. A great way to practise this is to breathe through a straw. You’ll see it takes a long time to fully breathe out. That long exhale is what dissipates the stress.
ENERGY SNACKS: Get up or calm down
Some people need an occasional pick-me-up, and others need to take the edge off. For the first type, I suggest caffeine gum or gummies. For the second, CBD (ask your GP) works great – again, gum or gummies. Decide which type you are, try a few options, then stock your golf bag.
Week 3: Competitive play, short game, final checks, what to pack

GREENSIDE: Own the basic shots
Around the greens, most golfers need to simplify. Like we said with the wedges, you need a clear system for picking and playing shots so that they feel familiar and reliable. I want you to start with one basic chip shot and once basic pitch shot. You’ll learn to adapt them; getting the baselines is the key.
For the chip, pick a wedge or 9-iron, stand very close to the ball, and set the shaft as vertical as you feel comfortable [right]. The club should favour the toe with the heel slightly off the ground, and your weight should be on your front foot. Take your putting grip and choke down. Now, just use your putting stroke. You’ll quickly get used to this easy shot.
For the pitch, I suggest not using your most lofted wedge – go one club up – because more loft just means a longer swing and more variables. Take a wider stance than the chip, play the ball just forward of centre, and open the clubface slightly. I want your only swing thought to be: turn the chest, back and through. It’s simple, and highly effective.
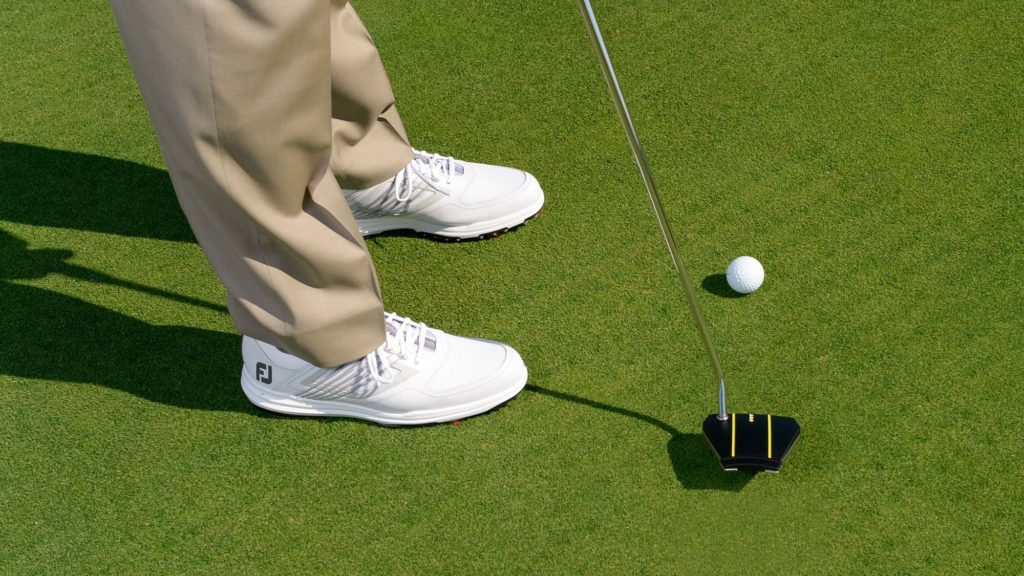
PUTTING: Train your stroke with these three drills
For short putts, set up a track with alignment rods that’s just wider than your putterhead and points to a hole. Work on swinging your putter through this track to hit square, straight putts.
From mid-range distances, speed and line are equally important. Set up a gate with tees about a foot in front of you on a breaking putt. Practise rolling putts through the gate at the right pace to break into the hole. Repeat on a putt that breaks the opposite way.
From 25 feet and out, speed control is king. Lay down a club 18 inches behind the hole. Hit long putts that either fall in the hole or stop past it but short of the backstop.
FINAL PREP: Allow yourself some confidence
The day before your big event, I want you to accomplish two things: be competitive, and get some final reps in the weakest area of your game.
Set up a morning round with players who like to compete, even do some betting. The idea is to hit shots and roll putts with something on the line. Go through your pre-shot routine on every swing; don’t be careless. Use the swing keys you’ve been working on.
After the round, reflect on what you did well and what you didn’t. You’ve got one final practice session to get comfortable. If you don’t have a glaring problem, do a short review of everything we’ve covered, spending equal time on the range and in the short-game area.
One final message from Dr Ara: get a good night’s sleep – it’s the ultimate competitive edge. We know you’re ready to do this, so enjoy the experience and bring back that green jacket!
Dr Ara Says
PRESSURE: Breathe in a box
Here’s another anxiety buster. It’s called box breathing. Picture a box in front of you. Trace each side of the box with your forefinger and do this: First side: breathe in for a count of five. Second side: hold that breath for five. Third side: breathe out for five. Last side: hold for five. Do this before a stressful shot – it’s instant relaxation.
MEDICINE BAG: Don’t get caught without
Carry paracetamol for aches (or a fever); a muscle rub for stiffness (menthol types also help insect bites); bandages for blisters; zinc for the onset of a cold; allergy medication; a nasal inhaler for congestion, and salt tablets for restoring hydration. Pack these, and you’re covered.
Instruction photographs by J.D. Cuban and Walter Iooss Jnr