Steve Williams – arguably the greatest caddie in history, having looped for Greg Norman, Tiger Woods and Adam Scott – takes us through his advice for playing each hole of the Composite course at Royal Melbourne.
1ST HOLE (1ST West)
par 4, 392 metres
“On the drive, you want to favour the right centre of the fairway to get the best look at the green, and you want to try to keep the ball below the hole, which is generally to the right of the hole or just past it.”
2ND HOLE (2ND West)
par 5, 449 metres
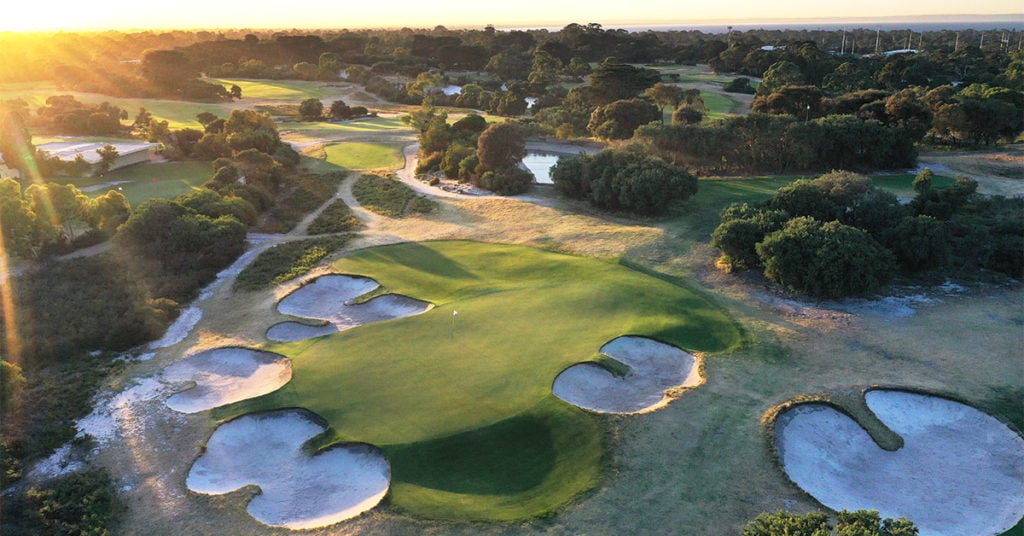
“When you stand on the second hole in normal conditions, you’re expecting to make a 4 and tour pros hope to have a putt for a 3. You have to take on the bunker to carry the centre of the fairway. It’s ideal to hit your approach to the very centre of the green, because you will have a makeable putt from anywhere, regardless of where the pin placement is. At worst, the middle of the green is an easy two-putt.”

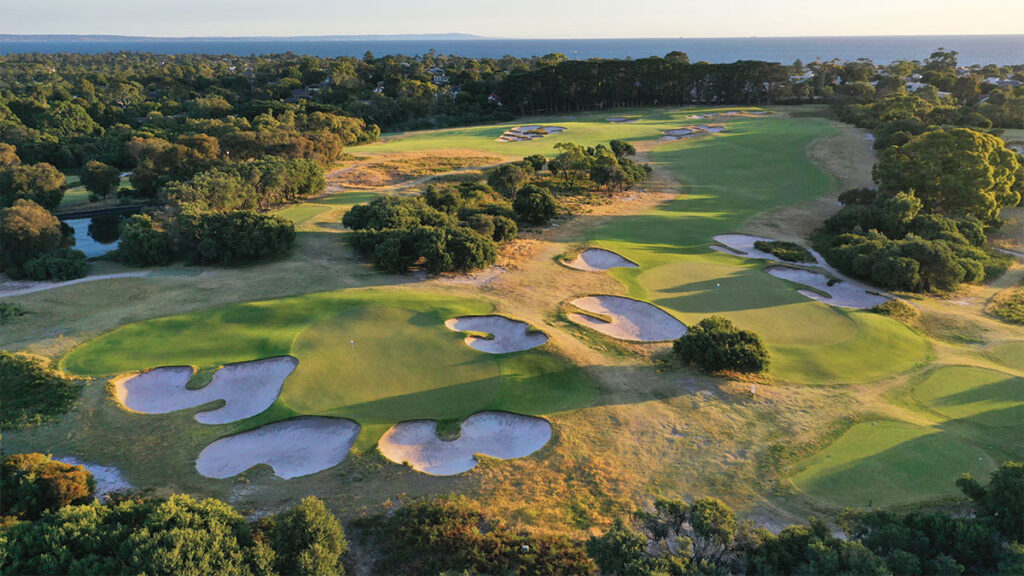
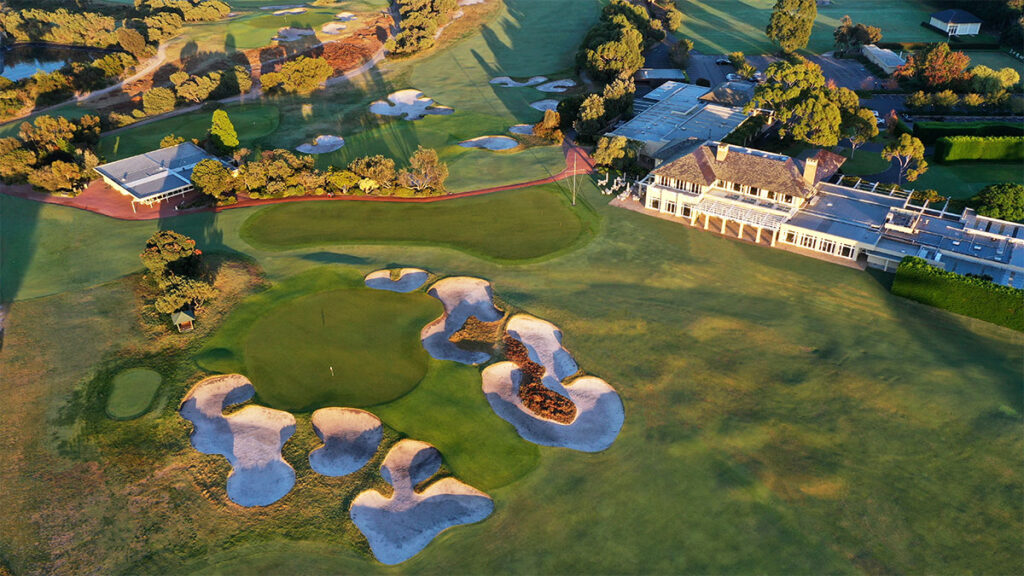
3RD HOLE (1ST East)
par 4, 304 metres
“In terms of distance, you can drive the ball on the green because once the ball feeds over the fairway bunkers, it slopes severely down to the green. But even if you can get it on the green, it’s actually very difficult to keep it on the green with the slope. If the pin is on the right, then you don’t want to miss your tee shot on the right. And if the pin is on the left, you don’t want to miss your tee shot to the left. You’ve got to be mindful on the tee where the pin is located, as to which line you’re going to take.”
4TH HOLE (2ND East)
par 4, 402 metres
“This hole ultimately suits a fade off the tee, so you can take the ball down the centre of the fairway. It’s an elevated tee shot. You don’t have to be too aggressive here – if it’s hard and fast, you can take an iron off the tee. If it’s not hard and fast, you can take a fairway wood. The key here is just to keep the ball under the hole and putt up the hill.”
5TH HOLE (5TH West)
par 3, 161 metres
“There are only two things to note here during an Australian Open. You want to know the distance to carry to the front of the green and the distance to the centre. Just put the ball dead centre regardless of where the pin is located.”
6TH HOLE (6TH West)
par 4, 391 metres
“It’s a generous fairway that doglegs to the right, but you must make sure you don’t go through the fairway into the rough on the left side, because this green is the hardest on the course to hit and the chances of hitting it out of the rough are slim. It’s vital to put the ball underneath the pin here. Even if your ball comes up short of the green, you’re better off there as opposed to being 35, 40 feet above the flag, putting down the hill. It’s one of the most treacherous greens.”

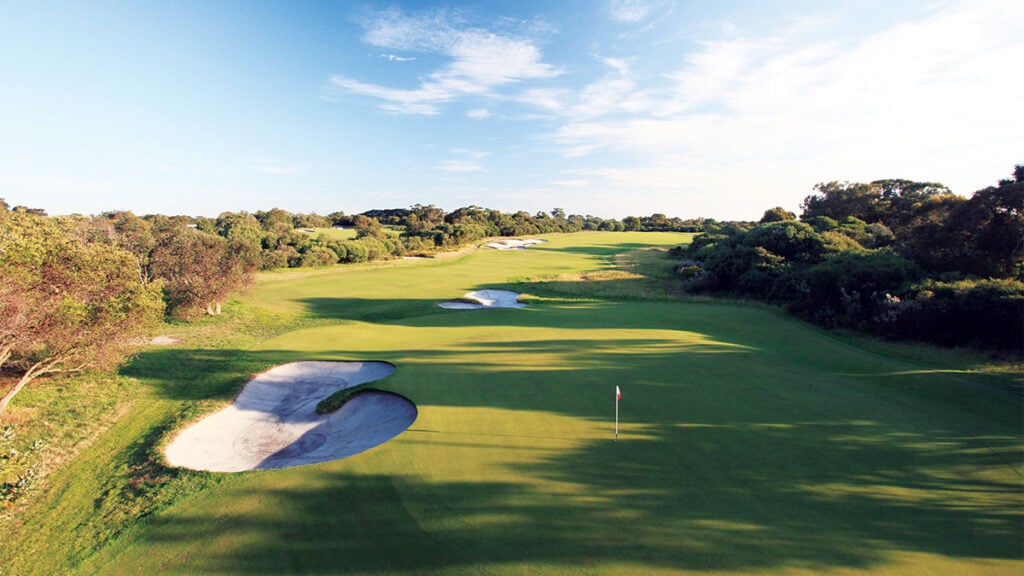
7TH HOLE (7TH West)
par 3, 135 metres
“One thing I’ve always found difficult on the seventh hole is judging the wind. The wind can swirl around a lot. You’ve just come from the bottom of the hill down there on No.6, and you’ve walked up to one of the high points of the golf course for the tee shot on No.7. Middle of the green is the perfect target. You don’t want to use that slope too much on the left as a bailout, because if you hit it in the left bunker, it’s very difficult to get up and down. This is another hole where the middle of the green will always produce a makeable birdie putt. In my opinion, it’s one of the top-10 short par 3s in the world.”
8TH HOLE (10TH West)
par 4, 285 metres
“Over four days of the Australian Open, you’ve got to go with a percentage play here and hit it off the fairway, down to the right side there, and pitch it on. It’s easy to hit the fairway with an iron and you would think that, out of four short second shots all week, you’d probably be able to get two out of those shots close. If you take a driver off the tee and don’t hit a good tee shot and put yourself in a difficult position, you could possibly make 5 or 6. It’s a great hole. It’s a tempting hole, but unless your back’s against the wall and you’re trying to make the cut or do something spectacular, the best strategy is to give yourself four short wedge shots from the fairway and the likelihood is a tour pro will make at least two birdies.”
9TH HOLE (11TH West)
par 4, 416 metres
“A relatively straightforward hole where you’ve just got to keep the ball out of the fairway bunkers. Generally, with no wind, those bunkers are very easy to carry. It’s a difficult hole to get the second shot close; you don’t have a lot of depth perception. The fairway is very flat, just a subtle, rolling fairway, and you can chase your approach up from short of the green if you need to. Making 4 is a good score.”
10TH HOLE (12TH West)
par 4, 435 metres
“It’s a sleeper hole that the pros play as a par 4 (it’s a par 5 for the members). If you can hit a hook off the tee, you’re going to have a short second shot in, but a tee shot hit too far left can make the hole a nightmare. If the fairway is firm and fast, you can’t play right of the bunkers, instead you have to aim directly over the bunkers because a well-struck drive could run through into the bush on the other side. If it’s down breeze, a lot of tour pros may take long irons to be able to draw the ball easier than a driver. Play it correctly and it’s a simple par and potentially a birdie for longer players.”
11TH HOLE (17TH West)
par 4, 401 metres
“This is a very good hole. It’s not a particularly difficult hole to hit the fairway, but like a lot of holes at Royal Melbourne, the green sits there and sort of begs you to hit it at the pin. But the middle of the green is very good here, because if the pin is sitting over to the right side, and you miss it on the right in the bunker, it becomes very difficult. Depending on where the wind is, an iron can be the right choice from the tee.”
12TH HOLE (18TH West)
par 4, 396 metres
“When you play a practice round, I always think it’s a great idea for the caddie to go ahead to the hill so he can see exactly where the ball landed. A player in the Australian Open should stand on that tee in a practice round and hit three balls on three different lines and have the caddie write down where each finishes. When I caddied for Greg Norman, I’d always stand in the fairway and note where each ball landed, then compare that with what Greg said about where he started each shot.”

13TH HOLE (3RD West)
par 4, 324 metres
“With a nice tee shot, a tour pro can make a 3 here. The tee shot favours a draw that starts just outside the treeline, and in firm conditions, a right-to-left shot can run down to the front of the green – if not onto the green. In good conditions, 3 West doesn’t present a lot of problems, but you don’t want to be too aggressive.”
14TH HOLE (4TH West)
par 5, 461 metres
“If you’re playing this in a southerly wind, the breeze will come across that hole from left to right. The fairway is generous but in the southerly, this becomes a very difficult second shot. It’s usually off a downhill lie, which makes the ball naturally squirt right, and this shot is often into a very strong left-to-right wind, which brings the front right bunkers into play. Greg hit one of my top three golf shots of all time here during the final round of the 1985 Australian Open. He hit a persimmon driver off the deck in a 40-kilometre-per-hour, left-to-right wind. In fact, the group ahead was still on the green. We thought there was no way he could reach the green. I’ll be looking forward to getting back to that hole.”
15TH HOLE (3RD East)
par 4, 350 metres
“When you’re standing on the tee it looks relatively simple, but you must hit a fade from the tee. You want the ball landing on the fairway and feeding to the right. If you don’t, it’s a very difficult green to hit from the left rough. It’s another green that sits there and begs you to hit your approach at the pin, but it’s a very difficult hole to get the ball close. You’ve got a bit of a downhill, sidehill lie for your second shot. Par is a good score.”
16TH HOLE (4TH East)
par 3, 184 metres
“In the practice round, players should hit a few balls to see where each lands and finishes. The tee shot plays deceptively further up the hill and longer than it appears. The distance the shot is playing to the middle of the green, factoring in the uphill and the side-slope, is all you need to know.”
17TH HOLE (17TH East)
par 5, 520 metres
“An absolutely brilliant hole. A generous tee shot that favours a slight fade and a lower trajectory to chase it down there if the fairway gets firm. Depending on how far you have in, there are three choices for the second shot. You can lay up short of all the fairway bunkers, or you can take on those fairway bunkers and knock it on the green, or you can play over to the left side, short of the two left-hand bunkers. The pin will dictate which way to choose. The key is to commit to your second shot choice because you don’t want to bail out. If you knock your drive into the fairway, you really want to make a 4.”
18TH HOLE (18TH East)
par 4, 395 metres
“A great finishing hole. The architecture around this green and the bunkering make it such an interesting par 4. In calm conditions, and a firm and fast fairway, it won’t be a very difficult second shot for Australian Open competitors and they’ll be trying to make a birdie. The key is to not spin the ball too much with the slope in the front of the green.”